Home / NEWS

My Equipment
Scope C14/G41-mount
ETX-Scopes
Canon 10D
TC-80N3 Timer
Olympus 2020
Digicam-Mounts
Telescope - Pier

Picture Gallery

Skywatch

Others
Links
Tests - Tipps


header2
 

Hyperstar / Fastar
Experiences and Hints


I do have 3 years experience using Hyperstar on my C14 with a OSC CCD type QHY8.
I am very happy with this combo TODAY and i get images today where the stars are small and perfect round in all corners (and in the middle). Also they do not show any spikes.

Based on this experience i see challenges between the start and the point of time when everythings works perfect and makes you happy  -  for everybody using Hyperstar the first time.

The challenge in detail is an equation with minimum 4 "floating" variables.
V1) Distance of CCD chip to the Hyperstar lens.
V2) Collimation of Hyperstar
V3) Getting the CCD Chip perpendicular to the optical axis
V4) Focusing over the whole image

If one of this variables is not perfect you can turn the others as much as you
want you dont get the equation solved and will miss good results.

V1) CHIP DISTANCE
Therefore i have turned V1 into a fix constant by buying the right adapter
between Hyperstar and CCD camera from Starizona to ensure 100% success here.
We are talking about distances less than a millimeter.
If you start with a selfmade adapters or those you have in some board around
you must be very lucky or talented not to end up in troubles.

V2) COLLIMATION
So having V1 removed, you have to know that V2 is the most time consuming
for every photosession. And if V1 is not fixed V2 will alway be a mess.
Collimation usually takes me 20 minutes before the session. If the temperature
changes strongly during the night until morning you will find out that when you remove
the hyperstar at the end of the session the collimation screws are not fixed
anymore because temperature drift has changed the distance between upper part
of hyperstar and lower part. Means your collimation is gone after you
remove the hyperstar. Next day you have to collimate again!

To collimate - strongly defocus a bright star in the center for collimation.
The dark circle should be perfect in the middle of the bright one.

Hyperstar Collimation

Than focus the bright star again and watch the star disk becoming smaller. If the form
changes from round to oval short before somehow in focus, go back to the beginning.
And move the collimation screws, which are in the direction of the oval axis, very small.
Focus again and check roundness if ok, goto to V3, else back again.

V3) TILT of CAMERA
Its the most difficult to solve if it happens. Must not be with your camera
but happened with mine. The camera chip or the camera was tilted approximately 0.1 mm -
i cannot say has it been the chip or the threads. However when i focused the
image on a star in the center i experienced little unsharp stars in the upper right
and lower left corner. When i focused the upper right perfectly the lower left became
even mor defocused and the middle ones so lala. Conclusio - I saw a diagonal tilt.
Squeezing a 0.1mm blade between camerathread and Hyperstarthread in one corner
removed the tilt, the image got flat and finally nice got round stars all over the image!

V4) FOCUS
Raw focus on bright star. Fine focusing on weak small stars first in the middle of the image
and than in the four corners.   (i use 5 seconds for full image exposures)
I focus/move the mirror always from outside to inside, pushing the mirror not pulling.
This focusing process usually works fast. No "masks" necessary. Using masks for focusing removes the ability to run the imaging session remotely and correct the focus during night remotely. (because you have to fiddle the mask under the cables etc...
When i get a temperature drift during night i "push" the focuser 5 - 10
steps with the focuser stepper using the robofocus software. This happens remote!
(For better understanding - Defocusing for collimation with above picture at the beginning for example is 10000 steps)
If i get sharp results i go ahead with imaging.
As i download each image into my living room immediately after capturing i see a focus shift happen in a few seconds. If its still not sharp
use again 5 - 10 steps pushing the focusser stepper in the same direction and watch until everything is sharp as wanted. If i overshoot i have to pull back the focuser 100 steps (because of C14 backlash)
and push back very near to the last absolute focuser position and start the 5/10 steps pushing methode again.
Here an example how the check of a raw image looks like:
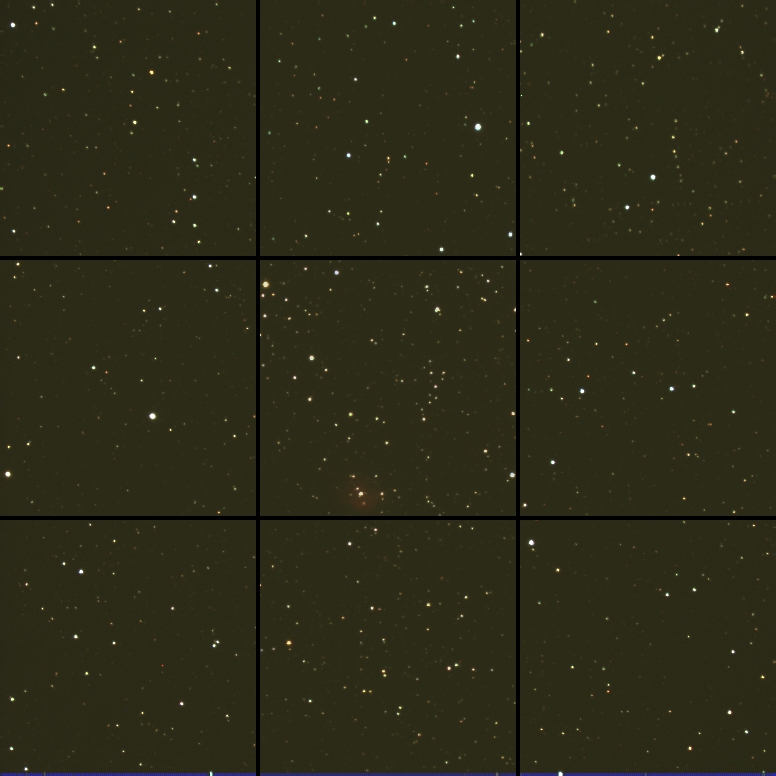
Sh2_157_RGB_Hyperstar
Shows Hyperstar Performance with QHY8 CCD Camera. This image selects the 4 corners, the centre,
the upper and lower and the left side middle and the right side middle part of the image of Sh2-157. Single Exposure 6 
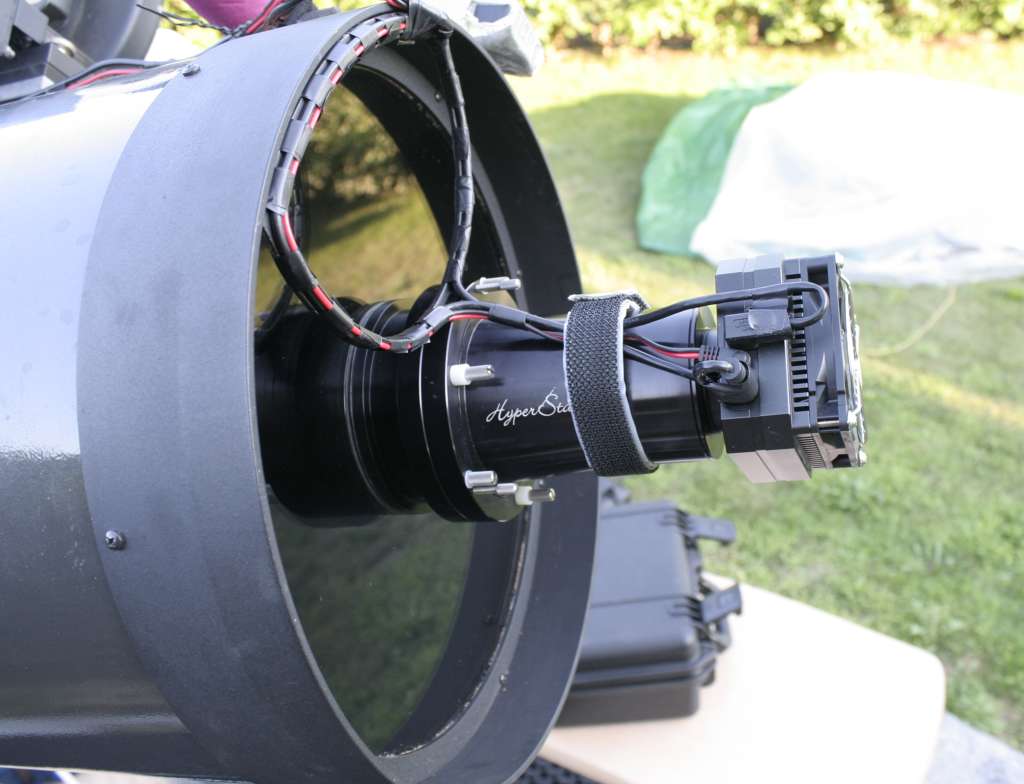
minutes with C14 and Hyperstar. Original total image 3040x2018 pixel. Selection of the image parts was done with the help of PixInsight Abberation Inspector. Selected image parts are 100% size.

Hyperstar Focus Check
During a good night i get 100% usable images, during a bad nights 90% of the images get usable for stacking. 10% are not in perfect focus.

Finally CABLING
If you examine most of the Hyperstar images in the net you will see that their stars have irregular and very thick spikes. This is because most users run the cables straight over the corrector plate.
There is a better way of cabling.
If you bind the cables and fix them over a perfect 180 degree halfcircle between
hyperstar and border of the corrector plate on a premade form, you will get perfect round stars and not the irregular boxes you can see on many images.

Hyperstar Cabling

CONCLUSION:
It will take some time until you have sorted out all things. It took me more than a year before i got to the point where everything became fine. So don`t expect to get perfect images after a few weeks of usage of Hyperstar...
In my opinion thats nearly to impossible if you care about quality of the images.

And - if you care about quality of the images to make Flats with Hyperstar is a must!
Only with flats you can push the images to the limits.
It took me also more than a month to get the correct flats with the right "curves". Trial and error was the method.
I did not change them afterwards, the same masters are working perfectly since 2 1/2 years...

I am convinced  the Hyperstar is a very good solution to use your C11/C14 with F2 and F11 and
i am very happy with mine. I only want to bring the expectations for the start to the right level
to reduce disappointment at the beginning and to be better prepared for all
challenges.


Links:
Drawing with dimensions for the holder of the cables on the C14
http://www.werbeagentur.org/oldwexi/fotos/Hyperstar_cable_holder_drawing.jpg